
5 steps to deploy an analytics agent on dbt MCP to your whole company
One repo. One config. The whole company gets an analytics agent powered by dbt - in just 5 steps with nao.

Last year at dbt Coalesce, every speaker was talking about the dbt MCP. In the audience, almost nobody knew where to install it and what to really do with it. The dbt MCP seems great to play locally with - but how do you scale it to production use cases?
I myself started by testing it locally in Cursor for development, and then Claude for chatting with data. It was hard to figure out the right configuration, understand the difference between local and remote MCP, which tools are available in core vs cloud - but I eventually succeeded to make it work locally.
Then, I thought: how do I roll this out to the whole company? Well, everyone has to install the dbt MCP. And that’s just not possible.
So, I found a way to deploy the dbt MCP as a chat bot, with just one yaml config. Actually, I literally founded it - we created an open source project https://github.com/getnao/nao to deploy agents on file system context, plus any tool or MCP you want.
The goal is: you setup a repo with your dbt MCP configuration. Then you deploy an agent UI so that anyone at the company can interact with it.
We’re going to do this in 5 steps:
👍 Choose the right dbt MCP
▶️ Initialize your nao project
⚙️ Configure the dbt MCP
💬 Test your analytics agent
🚀 Deploy to the whole company
👍 Step 1 - Choose the right dbt MCP
First, you need to choose which MCP server and tools you’re going to use for your agent. I’m going to sum it up very simply:
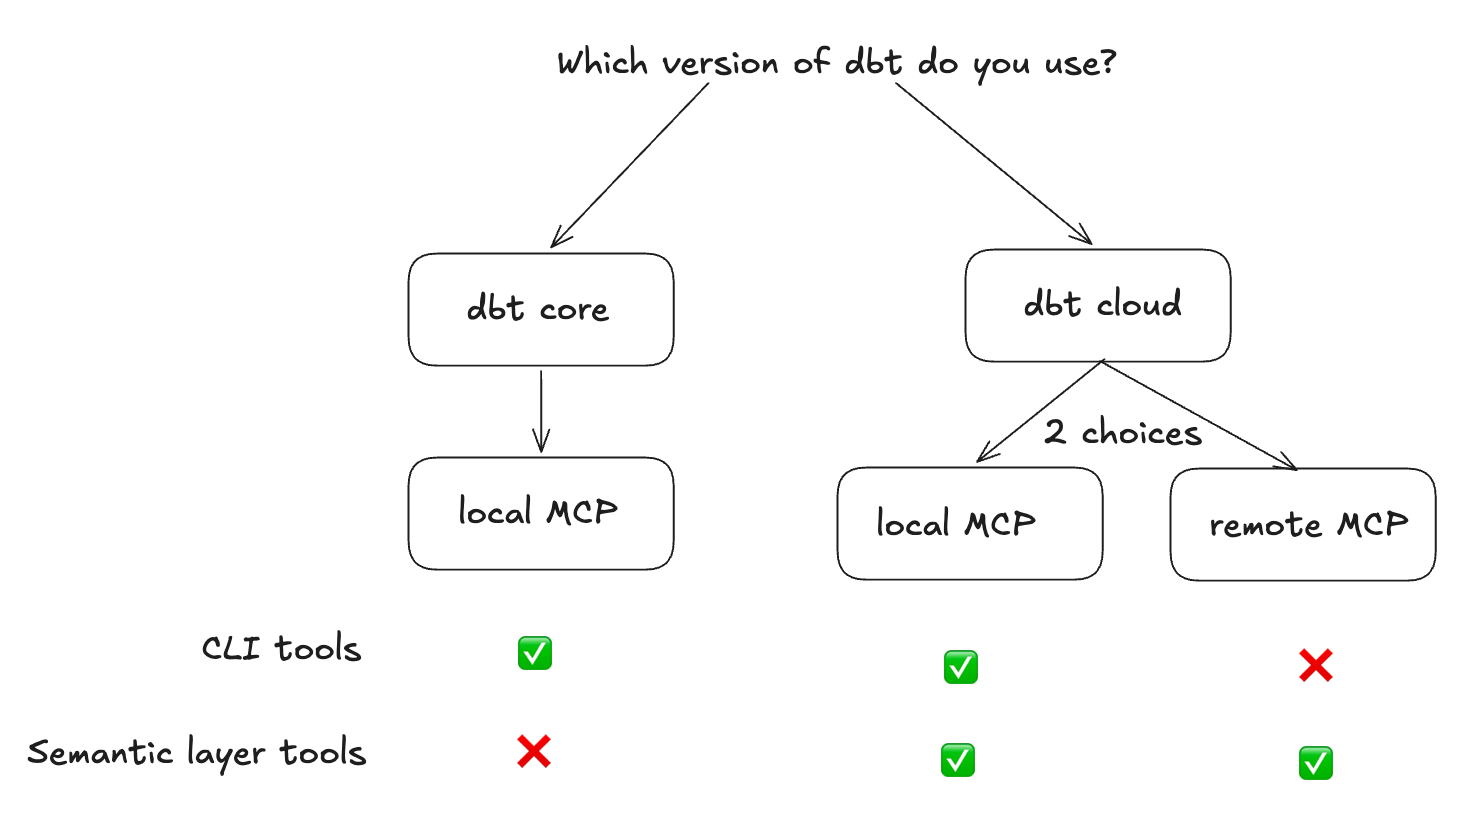
Are you on dbt Core? → Local MCP. Runs on your machine or container, points to your local project. You get 11 tools to launch the CLI, no license needed. dbt will execute queries with the tool dbt show.
Are you on dbt Cloud and don’t have a semantic layer? → Local MCP. Configured with your dbt Cloud API token instead of a local project path.
Are you on dbt Cloud and only want to query your semantic layer? → Remote MCP. The MCP server is hosted by dbt. No installation required - you point your client at a URL and pass auth headers. It gives you access to the Semantic Layer and Discovery APIs. No CLI commands, which makes it a bit more complex to use execute_sql tools and get out of the semantic layer.
⚠️ To use the semantic layer MCP - local or remote - you need to have at least a Starter license. Developer license is not enough. So no free option - after the free trial.
▶️ Step 2 - Initialize your nao project
nao is an open-source project for deploying AI agents on file system context plus any MCP. The idea is simple: you commit a config repo with your dbt MCP setup, deploy the nao agent UI, and anyone at the company can interact with their data in the browser.
To initialize your nao project folder:
Install nao-core package
pip install nao-coreInitialize a nao project
nao initFor a minimal setup, just give the name to your project, and add the dbt git repo in the context. No need to add a database context since we will have it through dbt MCP.
This will create a new folder in your current folder with the file system for the agent.Sync your repo (optional)
Launch this command in the folder created of nao project - this will sync your dbt repo here:nao syncNB: if you’re already located in your dbt repo and only testing this locally, you don’t have to add it in context of nao just yet.
⚙️ Step 3 - Configure the dbt MCP
Add an mcp.json file in your agent/mcp folder. The exact config depends on whether you’re using dbt Core or dbt Cloud.
In both cases, we’re using dbt local server.
dbt Core config:
{
  "mcpServers": {
    "dbt-mcp": {
      "command": "uvx",
      "args": ["dbt-mcp"],
      "env": {
        "DBT_PROJECT_DIR": "/path/to/your/dbt-project",
        "DBT_PROFILES_DIR": "/path/to/your/dbt-project",
        "DBT_PATH": "/path/to/venv/bin/dbt",
        "DBT_TARGET": "target_name",
        "DISABLE_SEMANTIC_LAYER": "true",
        "DISABLE_DISCOVERY": "true",
        "DISABLE_SQL": "true",
        "DISABLE_ADMIN_API": "true"
      }
    }
  }
}
dbt Cloud with Semantic Layer config:
{
  "mcpServers": {
    "dbt-mcp": {
      "command": "uvx",
      "args": ["dbt-mcp"],
      "env": {
        "DBT_HOST": "us1.dbt.com",
        "MULTICELL_ACCOUNT_PREFIX": "your_prefix",
        "DBT_TOKEN": "${DBT_TOKEN}",
        "DBT_PROD_ENV_ID": "your_env_id",
        "DISABLE_SEMANTIC_LAYER": "false",
        "DISABLE_DISCOVERY": "true",
        "DISABLE_SQL": "true",
        "DISABLE_ADMIN_API": "true",
        "DISABLE_REMOTE": "false"
      }
    }
  }
}
💬 Step 4 - Test your analytics agent
To start chat, launch this command in your nao folder project:
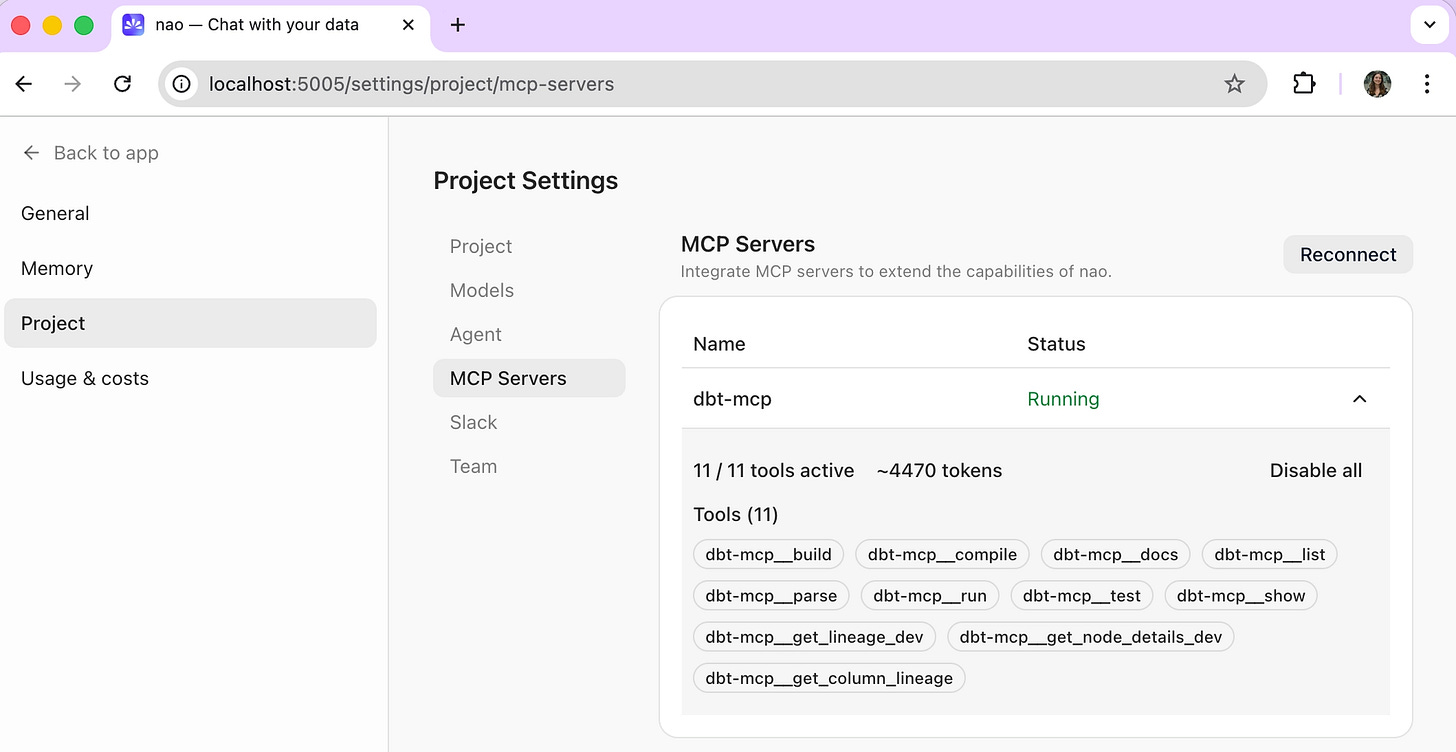
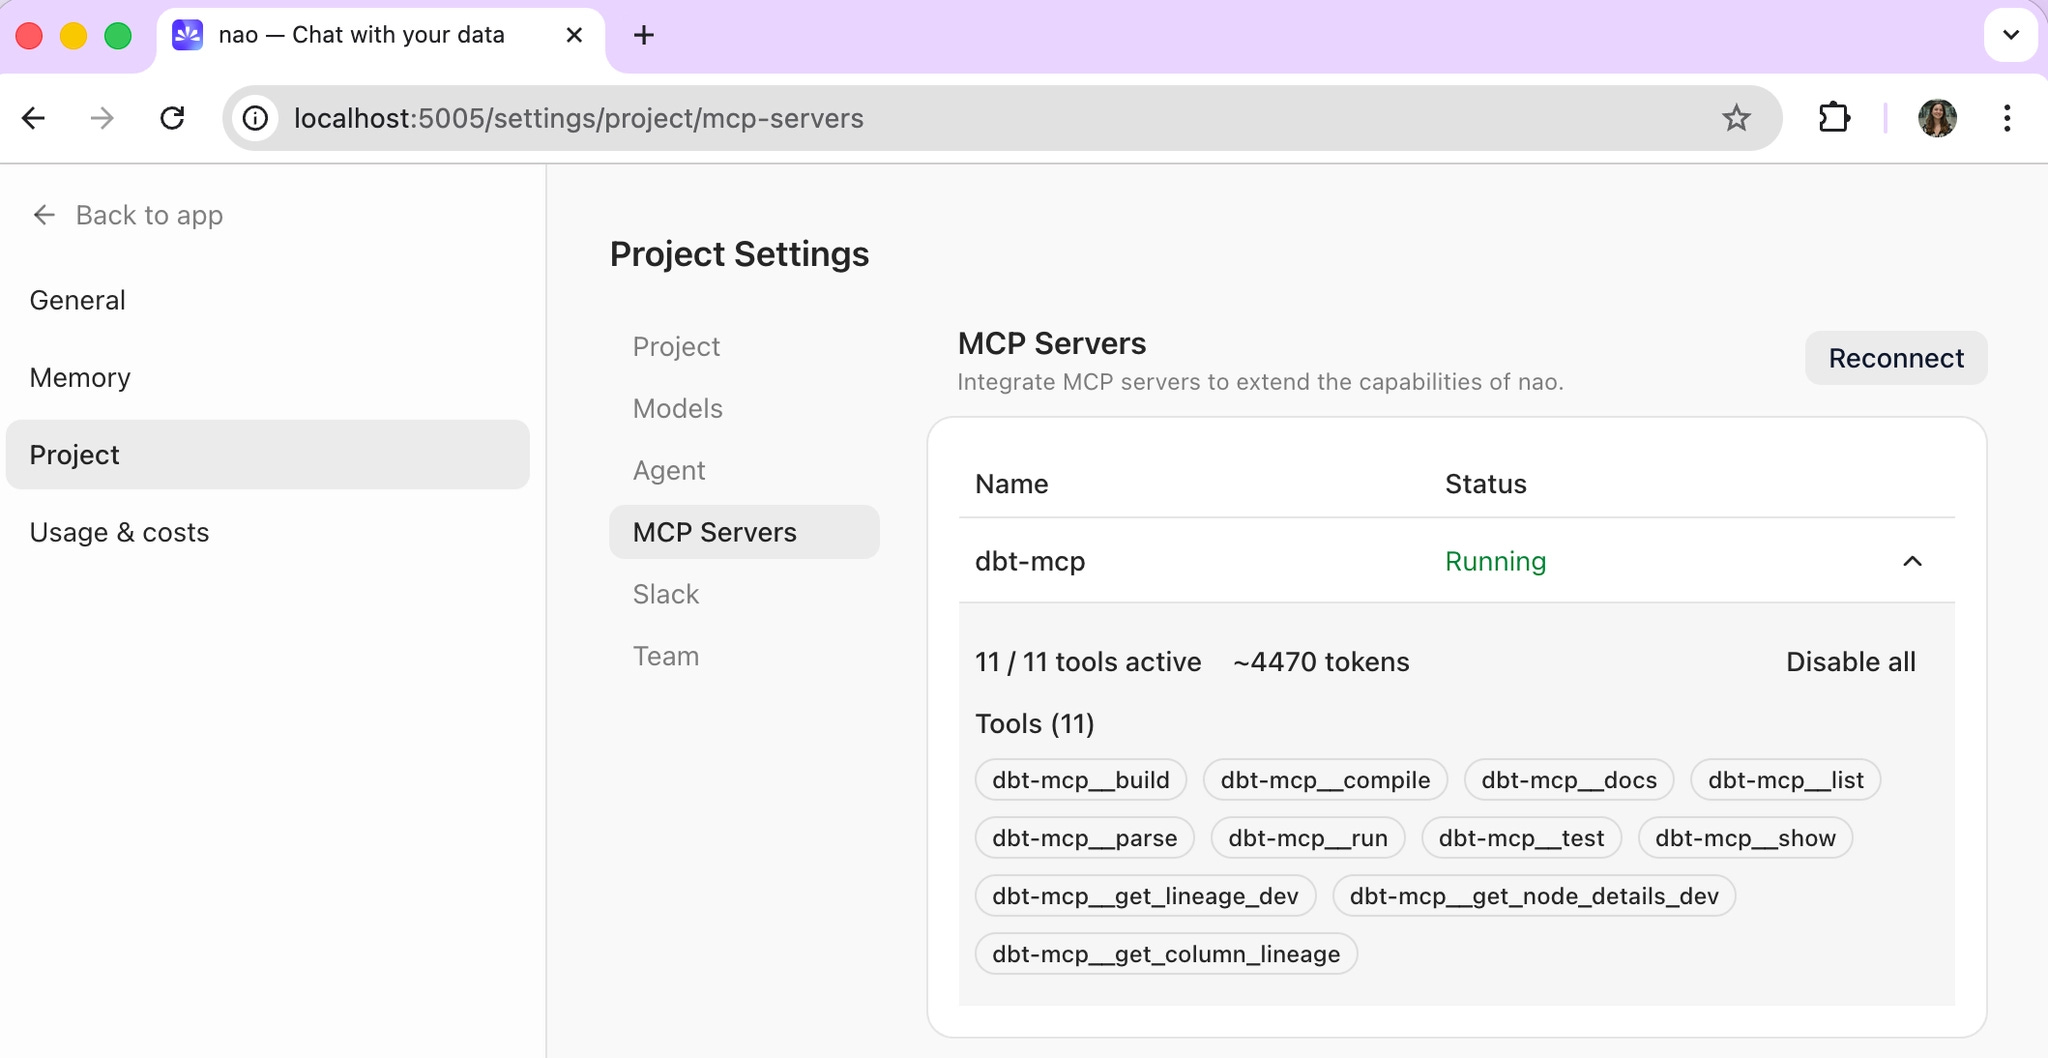
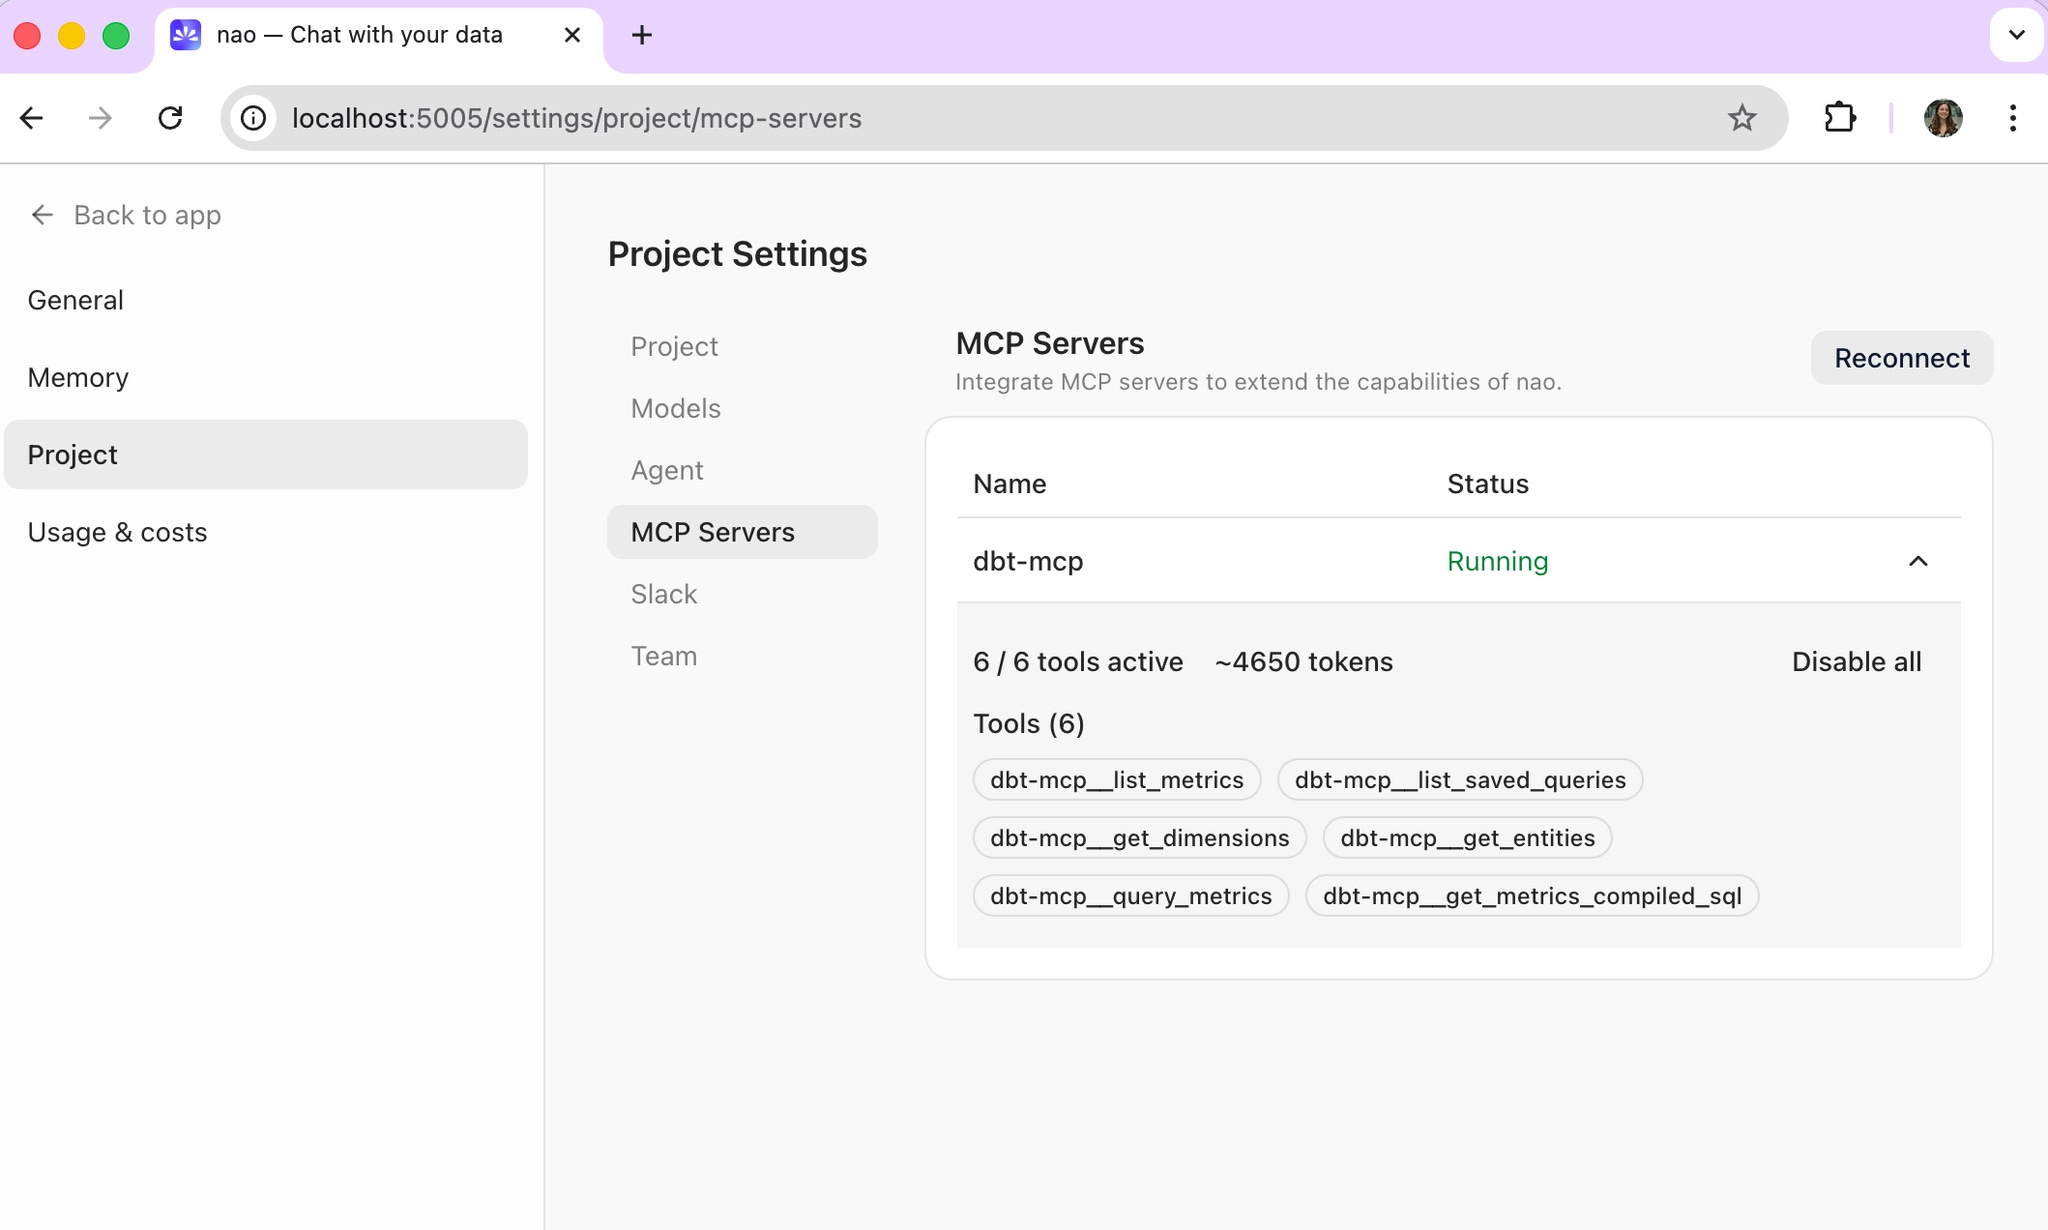
nao chatIn the admin panel under Project > MCP Server, you can verify the dbt MCP is connected and see which tools are active. This is also where you can toggle individual tools on or off.
What you should see:
dbt Core: 11 tools active
dbt Cloud: 6 tools, dedicated to the semantic layer.
dbt docs here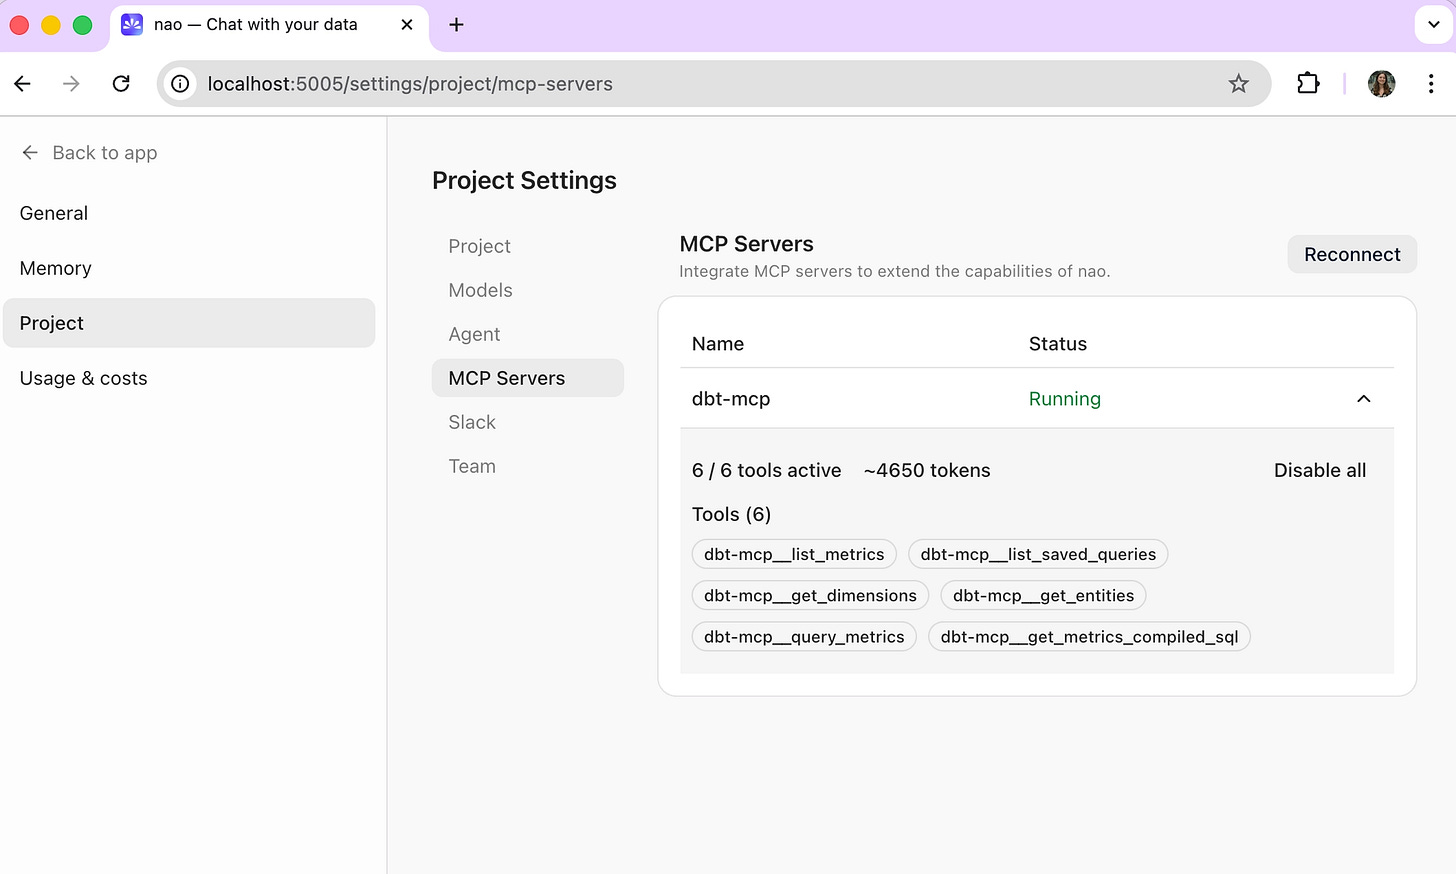
Then, start a first conversation in the UI.
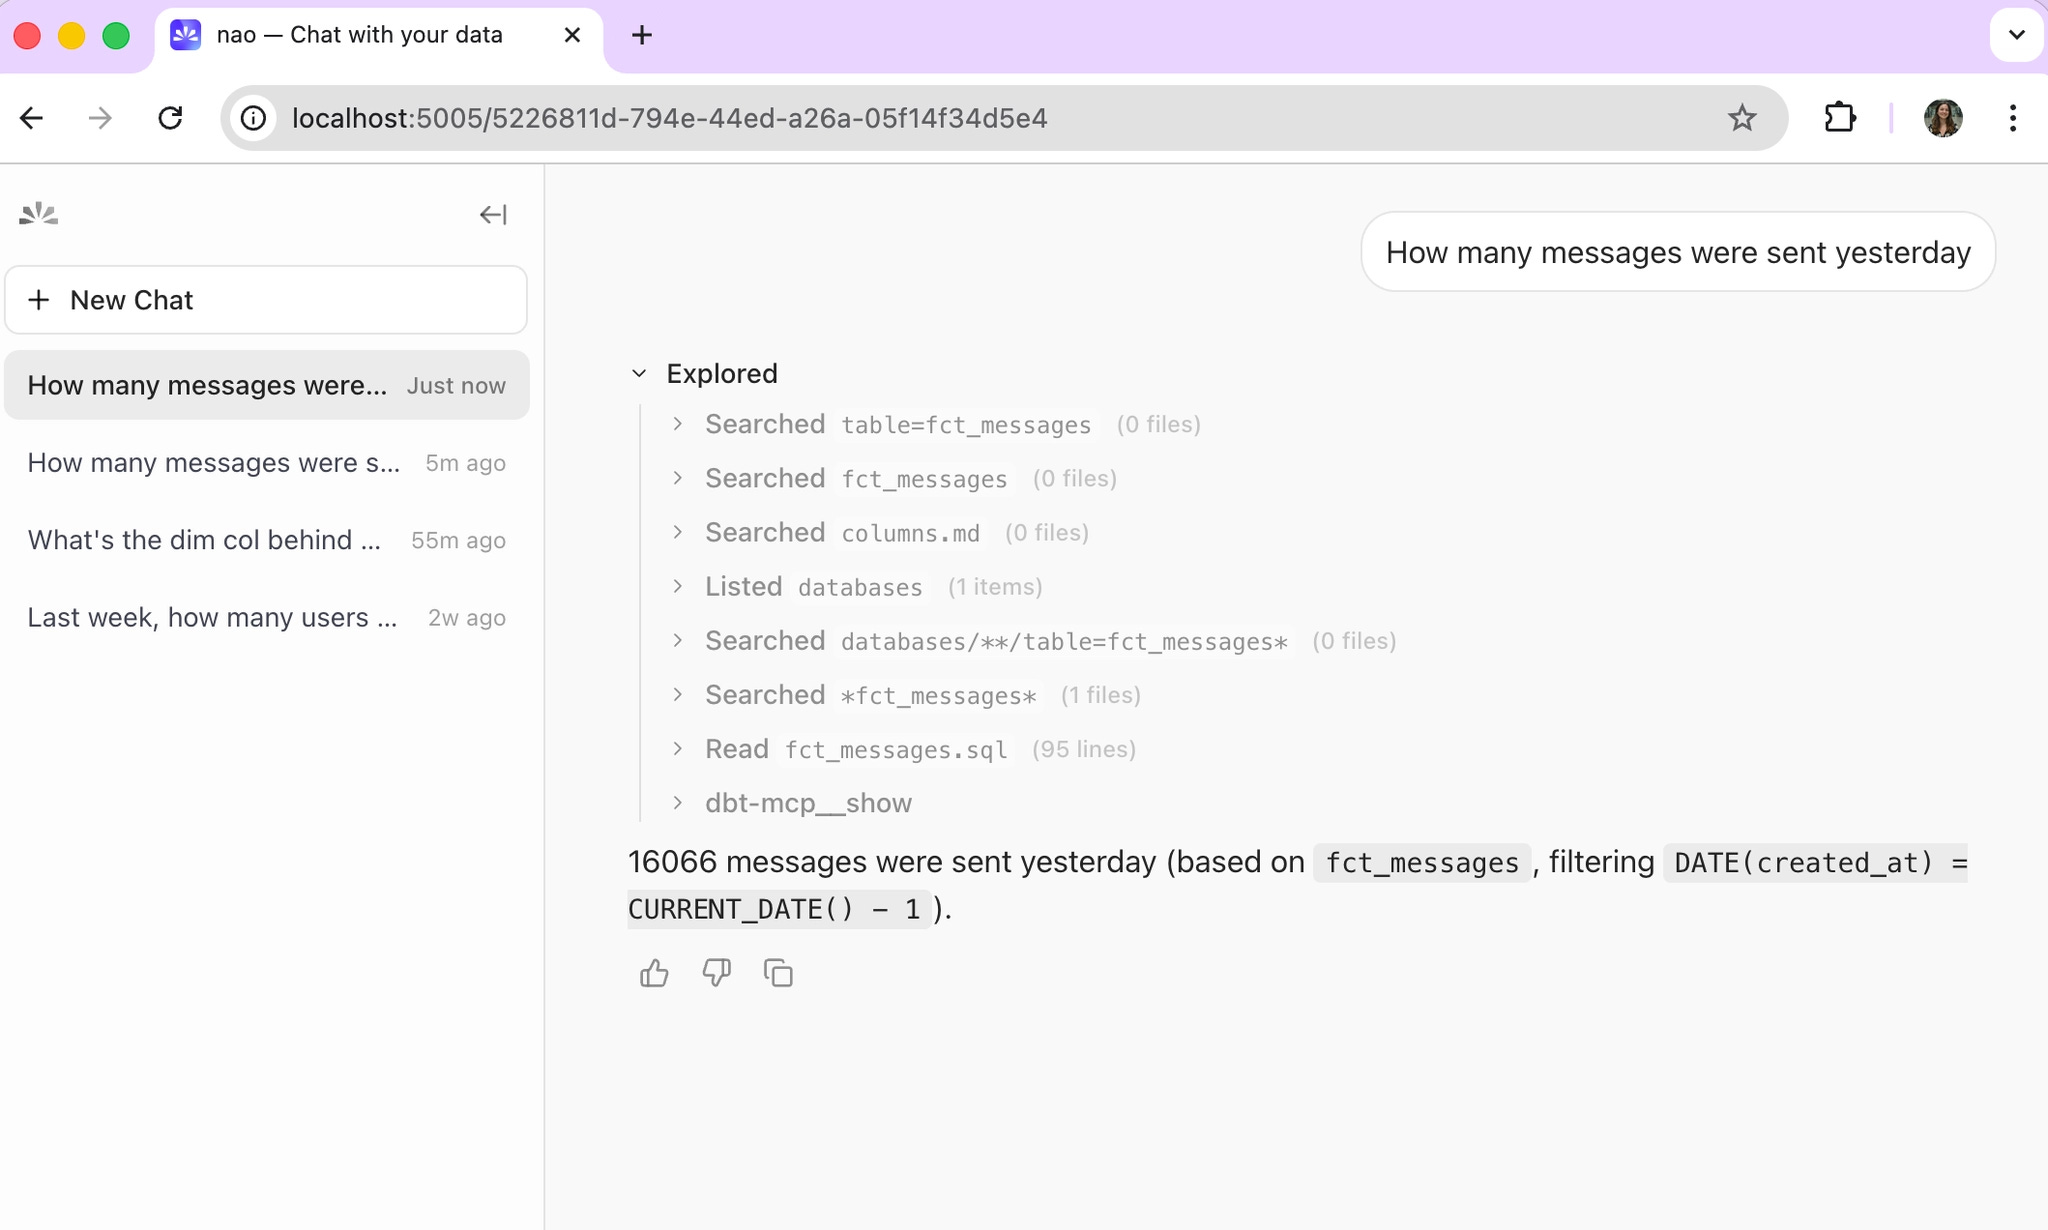
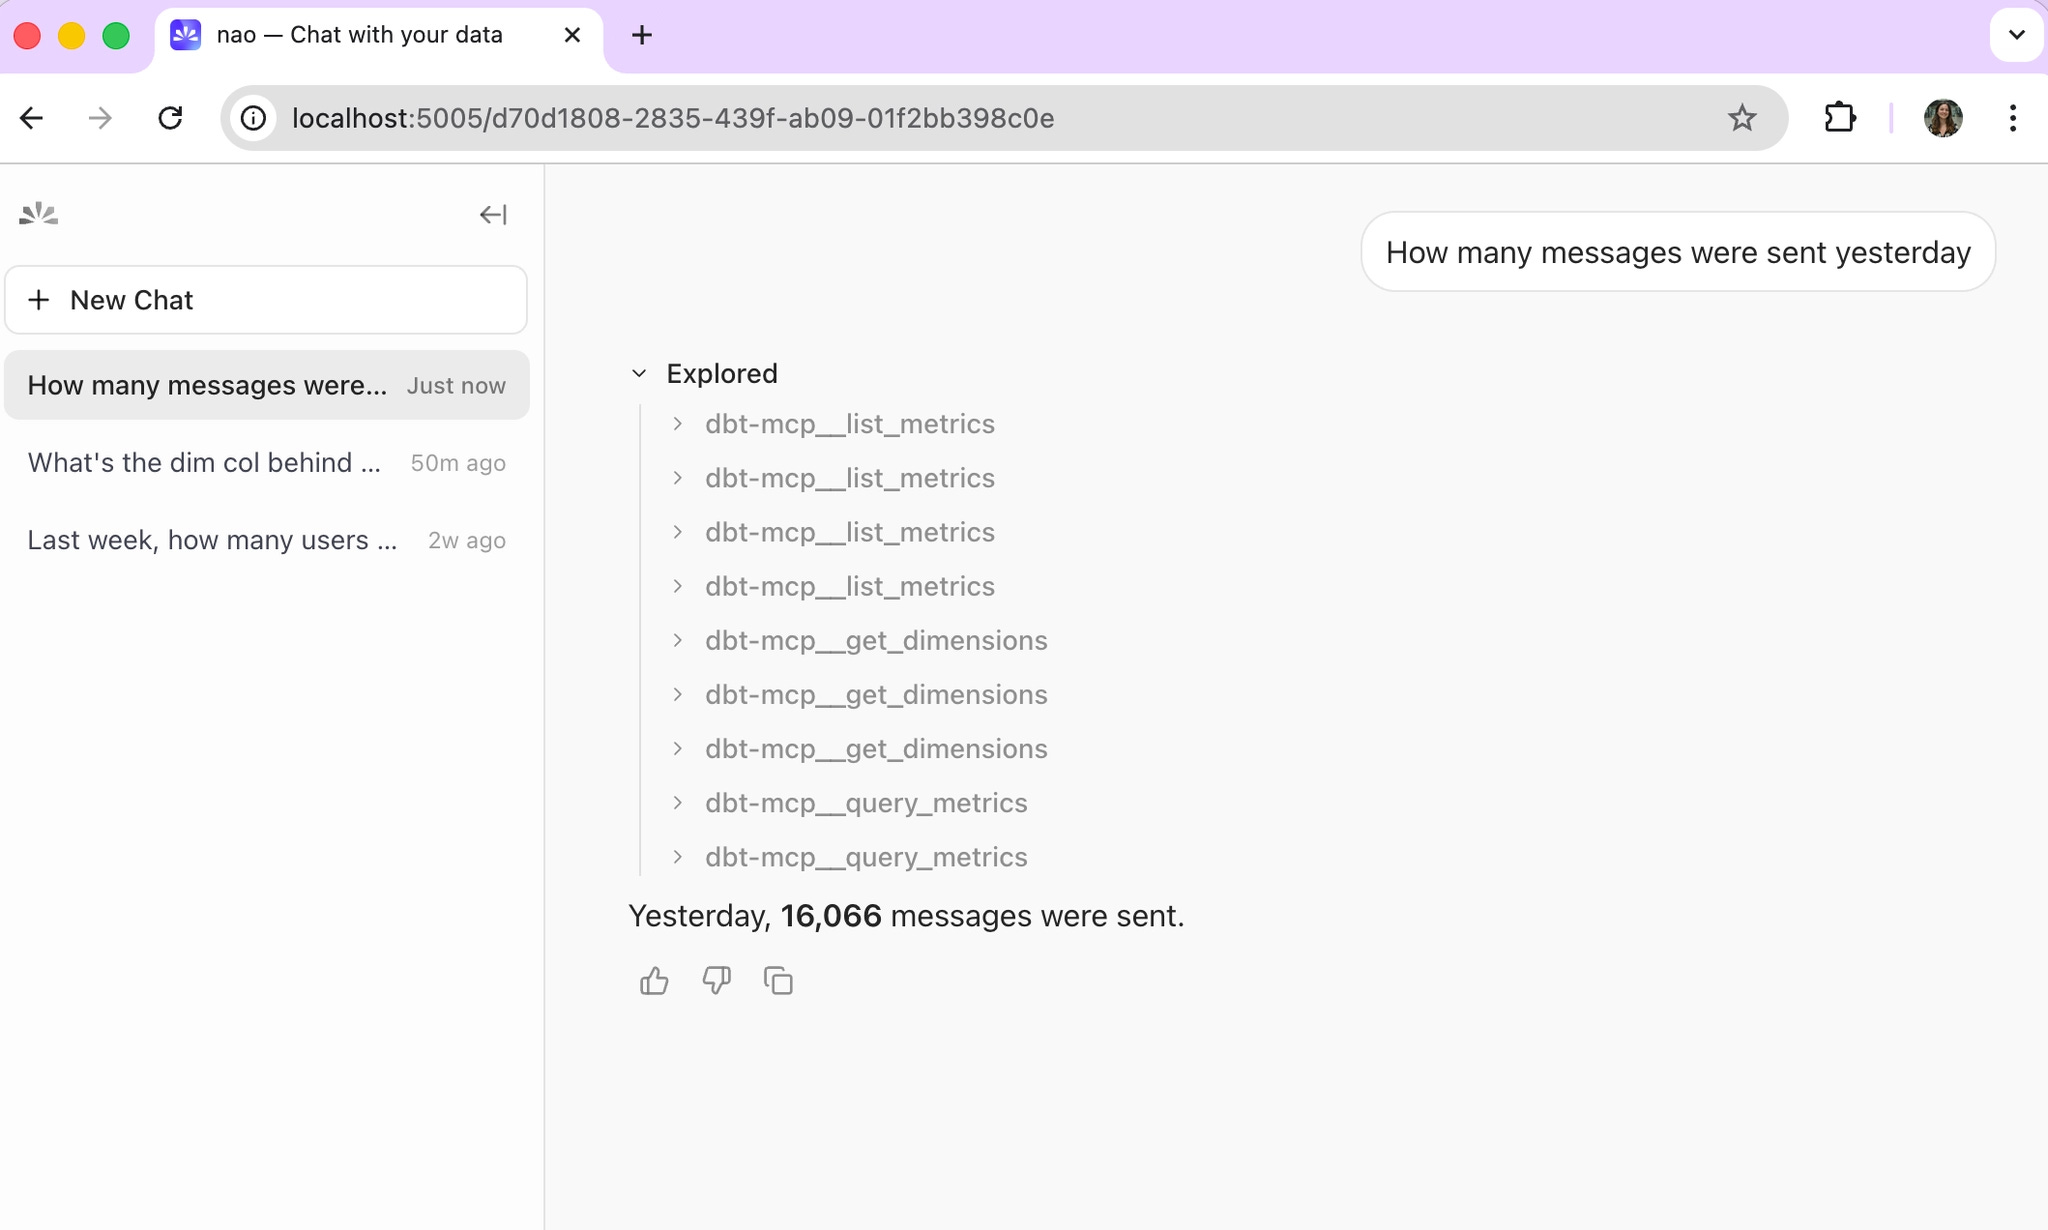
For dbt Core, the agent uses dbt_show to run queries against your models directly. For dbt Cloud, it retrieves metrics and dimensions via the Semantic Layer - no SQL, no raw model access.
Example chat using dbt Core - agent queries data via dbt show
Example chat using dbt Cloud - agent queries via Semantic Layer metrics
The experience differs in an important way:
Core is more flexible, but less governed. It can create any SQL and query any table. You can see in the example that it’s researching existing dbt models, not specific dimensions or metrics.
Semantic Layer is more constrained but more reliable. The agent only queries dimensions and metrics your data team has explicitly defined and tested.
🚀 Step 5 - Deploy to the whole company
Once local testing works, you can deploy and self-host nao agent to the rest your team.
You can check our full deployment guide here, and follow these specific steps to make the dbt MCP available in deployed version.
If you’re using the dbt core MCP
Update the mcp.json paths to point to locations inside Docker
{
  "mcpServers": {
    "dbt-mcp": {
      "command": "uvx",
      "args": ["dbt-mcp"],
      "env": {
        "DBT_PROJECT_DIR": "/app/project/repos/dbt",
        "DBT_PROFILES_DIR": "/run/secrets/dbt",
        "DBT_PATH": "/usr/local/bin/dbt",
        "DBT_TARGET": "target_name",
        "DISABLE_SEMANTIC_LAYER": "true",
        "DISABLE_DISCOVERY": "true",
        "DISABLE_SQL": "true",
        "DISABLE_ADMIN_API": "true"
      }
    }
  }
}
Install dbt in the container.
FROM getnao/nao:latest

# Install dbt and one adapter package (override at build time if needed)
ARG DBT_ADAPTER=dbt-bigquery
RUN python -m pip install --no-cache-dir --upgrade pip \
 && python -m pip install --no-cache-dir dbt-core ${DBT_ADAPTER} \
 && dbt --version

# Copy your project files
COPY . /app/project/

# Set working directory
WORKDIR /app/project
In your container setup, mount profiles.yml as a secret.
If you’re using the dbt cloud MCP
Just add your MCP variables as env variables in the container setup.
💡 What’s next: from MCP to a reliable analytics agent
Getting the dbt MCP connected is the starting line, not the finish line. The quality of your agent’s answers depends heavily on the context it has access to - and out of the box, your dbt MCP gives it tools, not knowledge.
A few next steps worth investing in:
Add more context sources. Connect your data warehouse documentation, Notion pages, or internal metric definitions. The agent needs to know what your tables mean, not just what they contain.
Start context engineering. This is where most teams underinvest. Set up unit tests with nao test and start measuring which context sources actually improve answer reliability. Running evaluations early - even with 10-15 test questions - will tell you faster than intuition where the gaps are.
Iterate on your dbt documentation. The best analytics agents are built on top of well-documented dbt projects. Column descriptions, model docs, metric definitions: these aren’t just nice-to-have anymore. They’re the context layer your agent reasons over.
I’ll write more on the context engineering side in a future post — specifically what I’ve found about which context sources matter most for analytics agents. In the meantime: try this setup, and let me know how it goes.
Let me know how the setup went on your side!